Integrating a heat pump into Home Assistant with EMS-ESP
This guide assumes that you have already installed ems-esp.
Integrating ems-esp
After successfully installing Home Assistant, you will see the following onboarding screen.
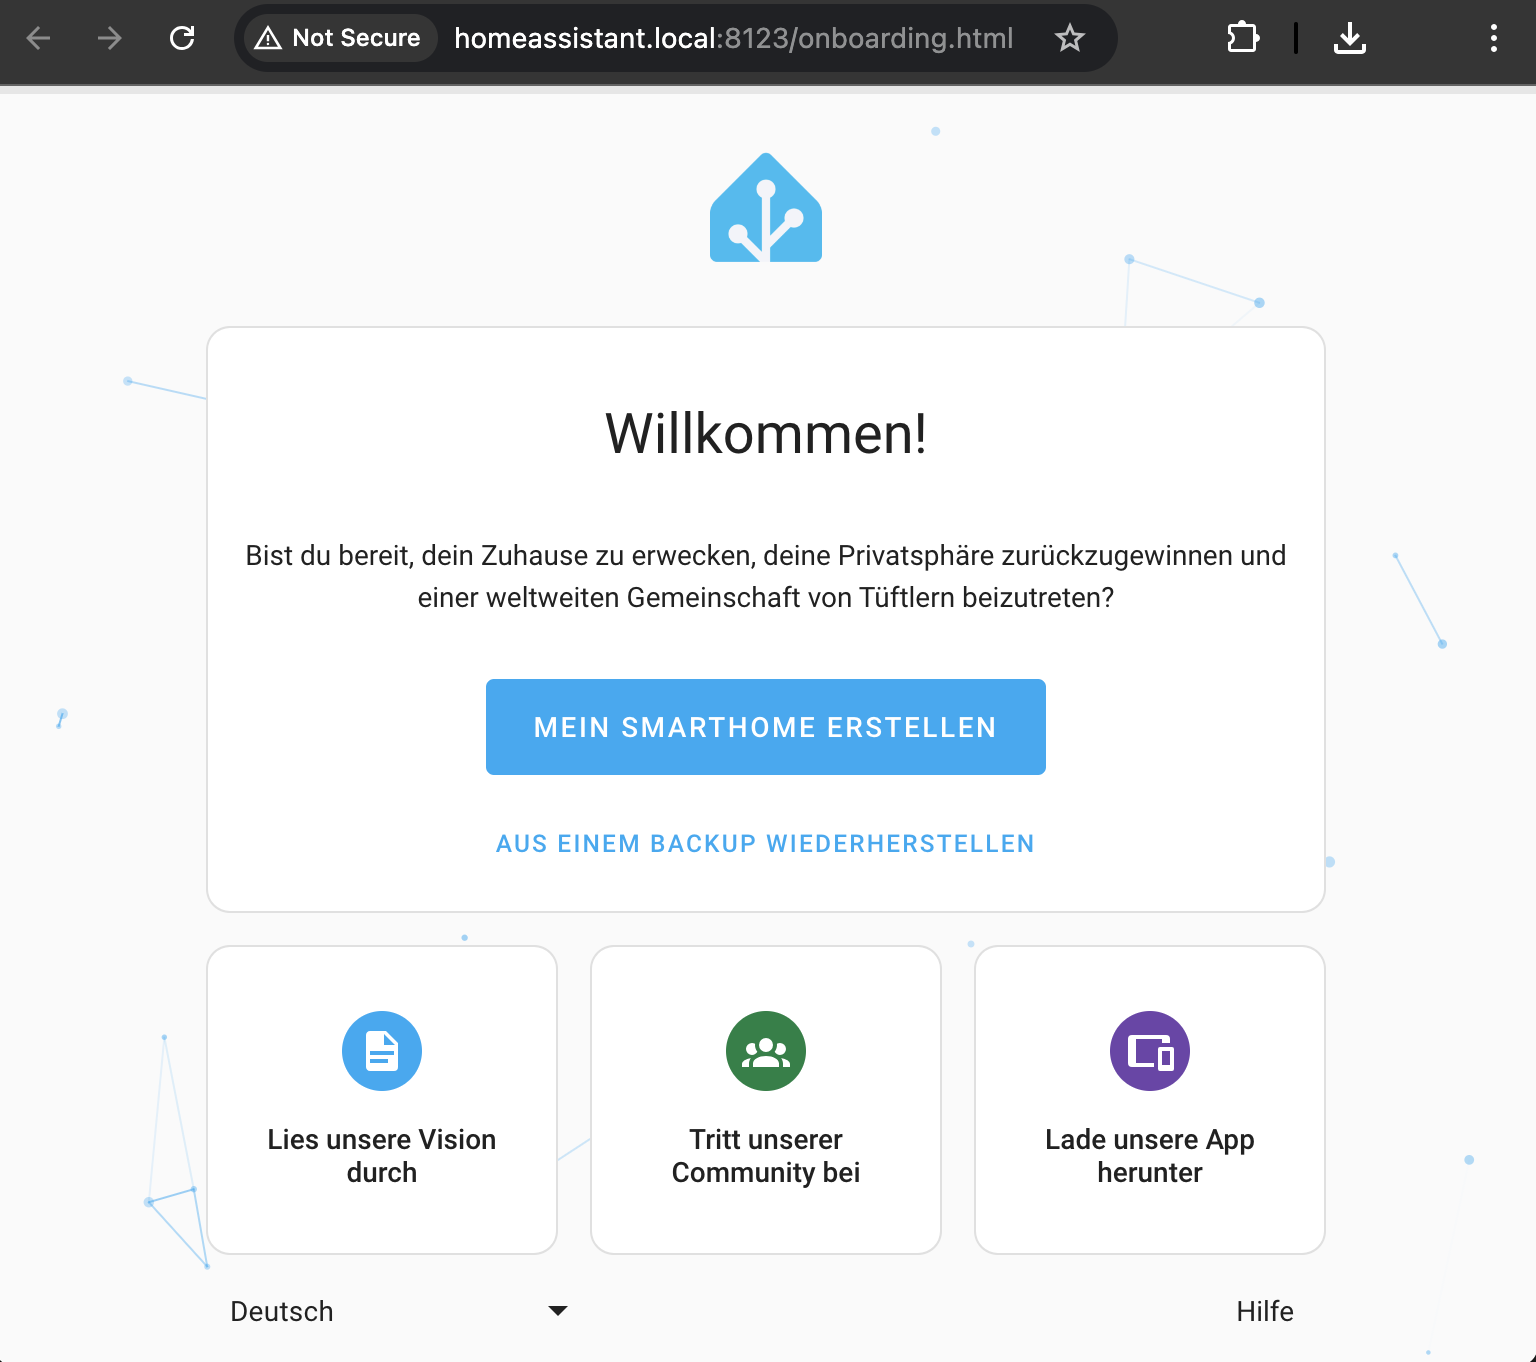
Clicking CREATE MY SMART HOME prompts you to create a user account and select an address. In the next step, you can provide Home Assistant with optional telemetry data. In the final step, devices that Home Assistant was able to identify on the local network during installation are displayed—for example, a Fritzbox and Smart Plugs from Shelly.
Home Assistant cannot identify ems-esp directly. You can quickly change this by selecting Add Integration under Settings → Devices & Services. Enter MQTT in the provider search.
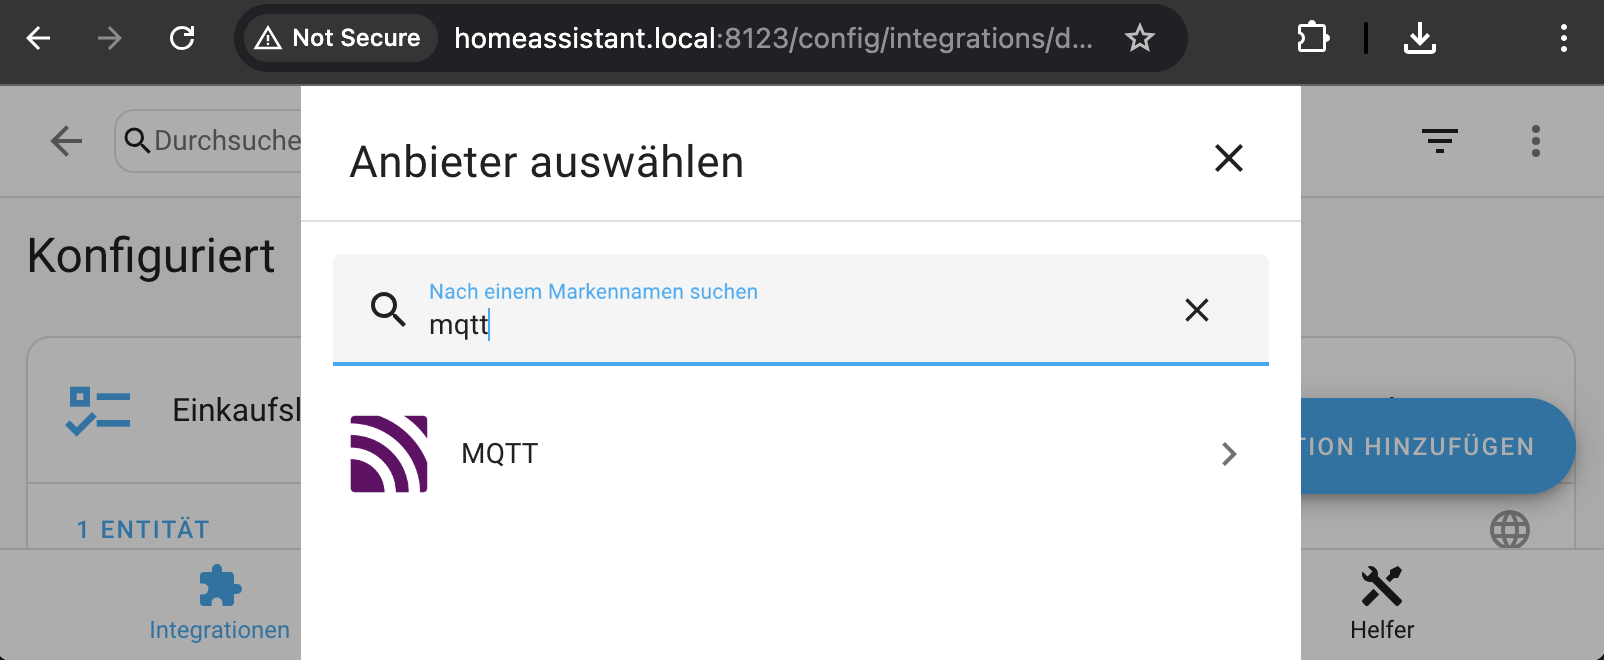
A dialog then opens in which you can install the official Mosquitto Mqtt Broker add-on. Once you have successfully connected the MQTT integration, you will see an overview of all devices identified via MQTT Discovery:
- ems-esp Boiler = heat pump
- ems-esp = Gateway Module
- ems-esp Thermostat = thermostat
After confirmation, you return to the overview, where all available entities are now displayed.
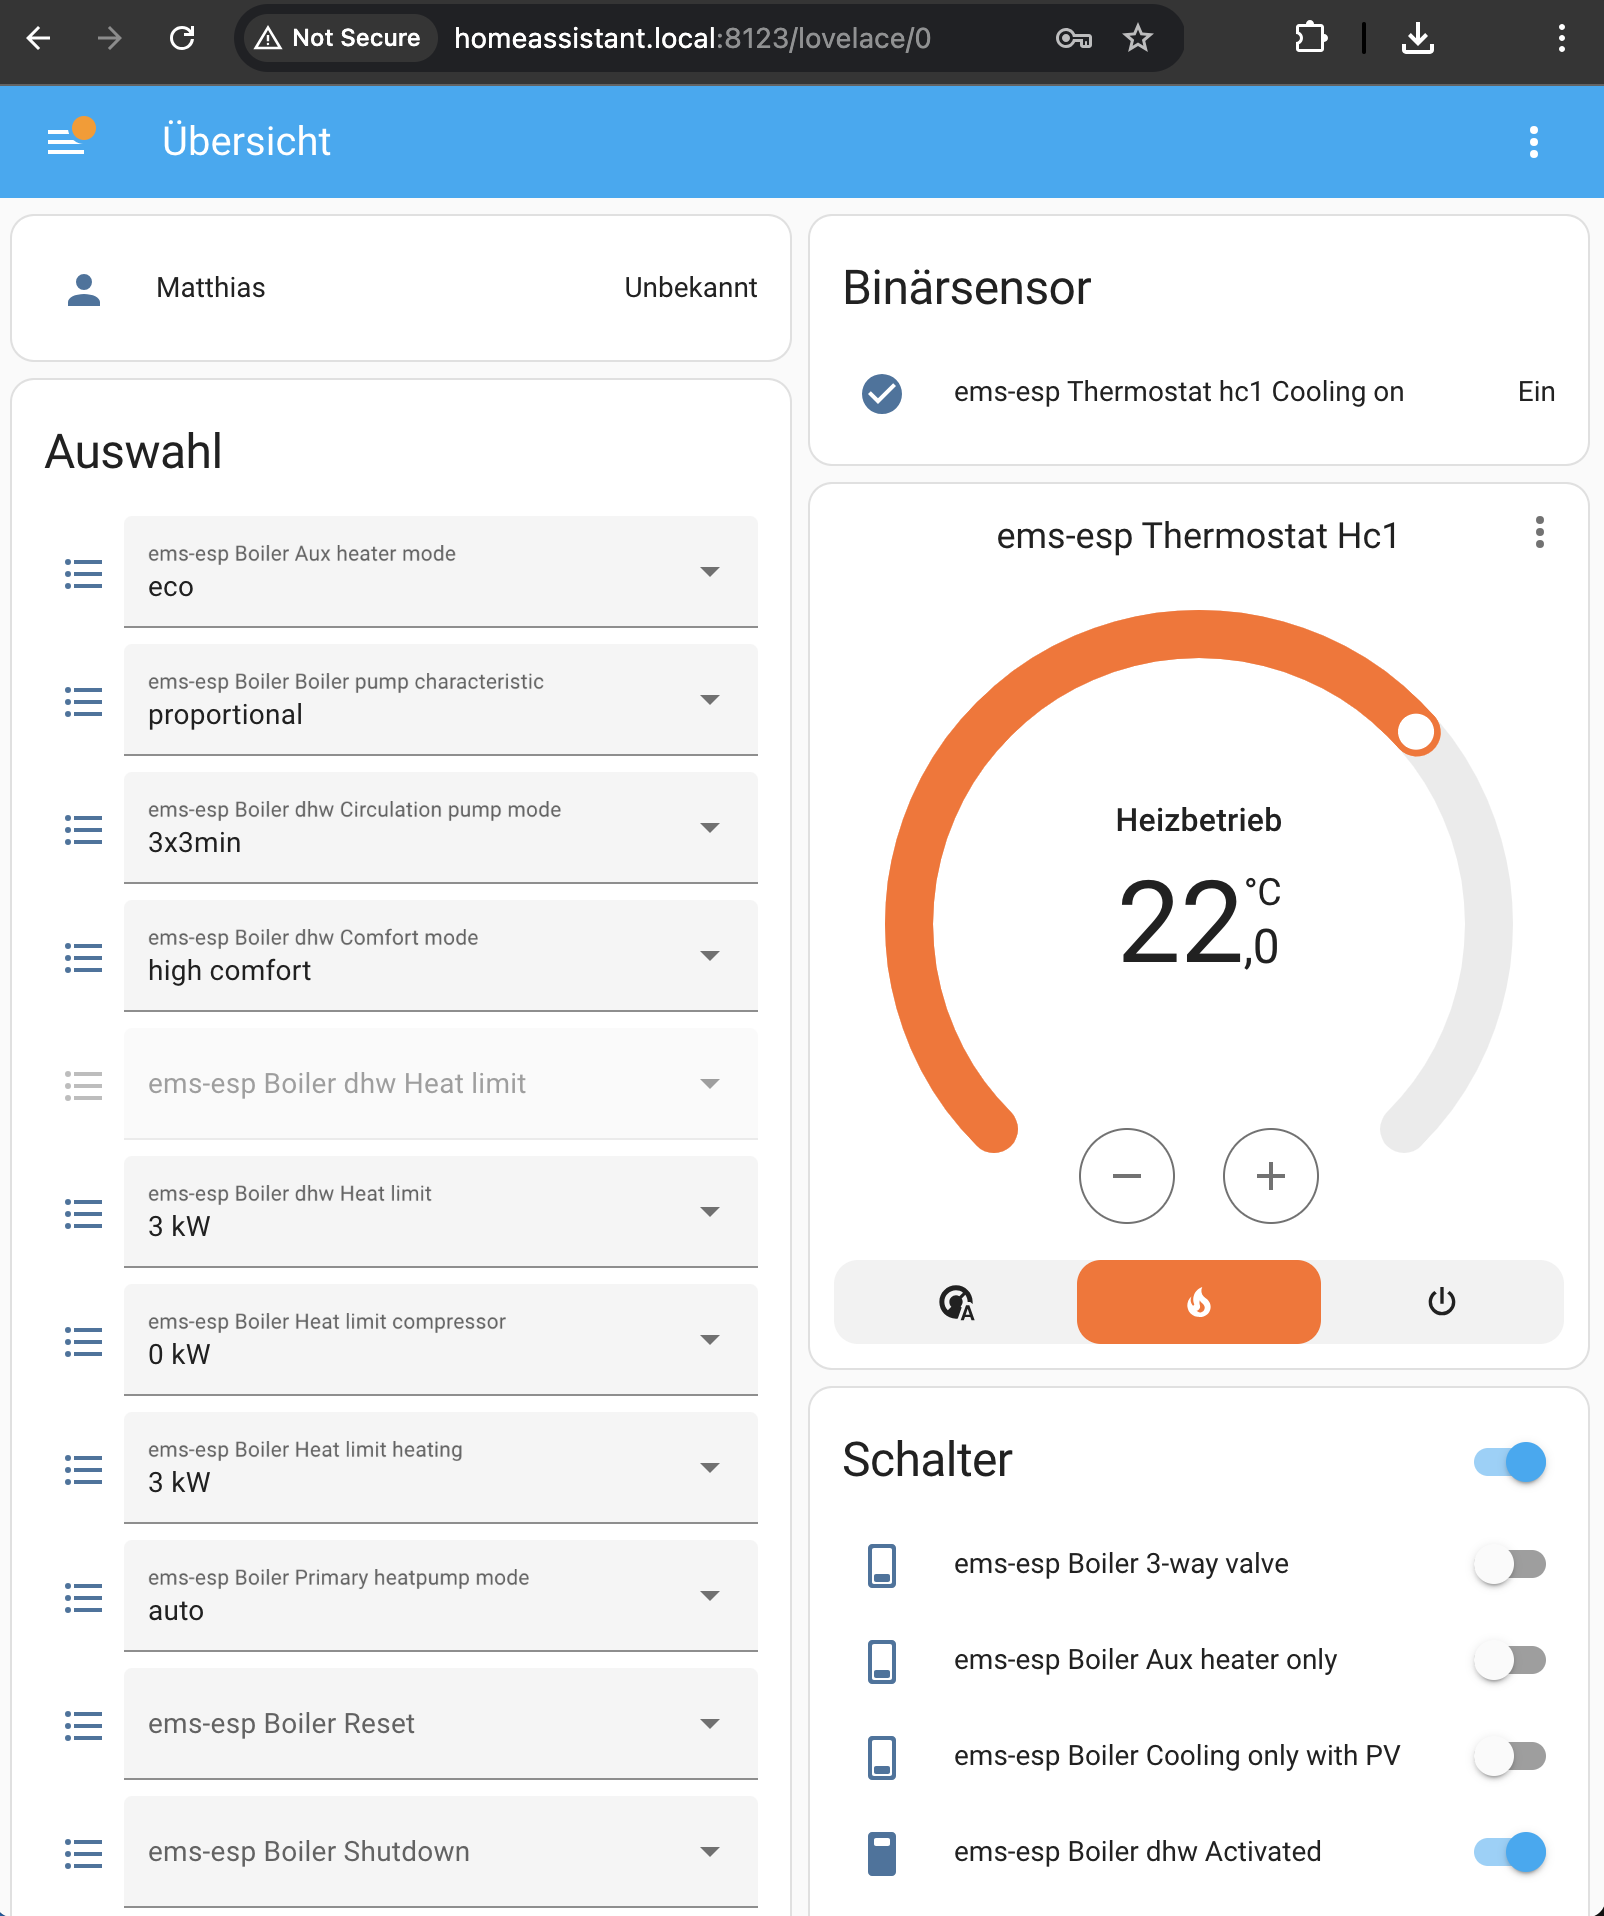
A more detailed installation guide can also be found directly at ems-esp.
Visualizing measured value history
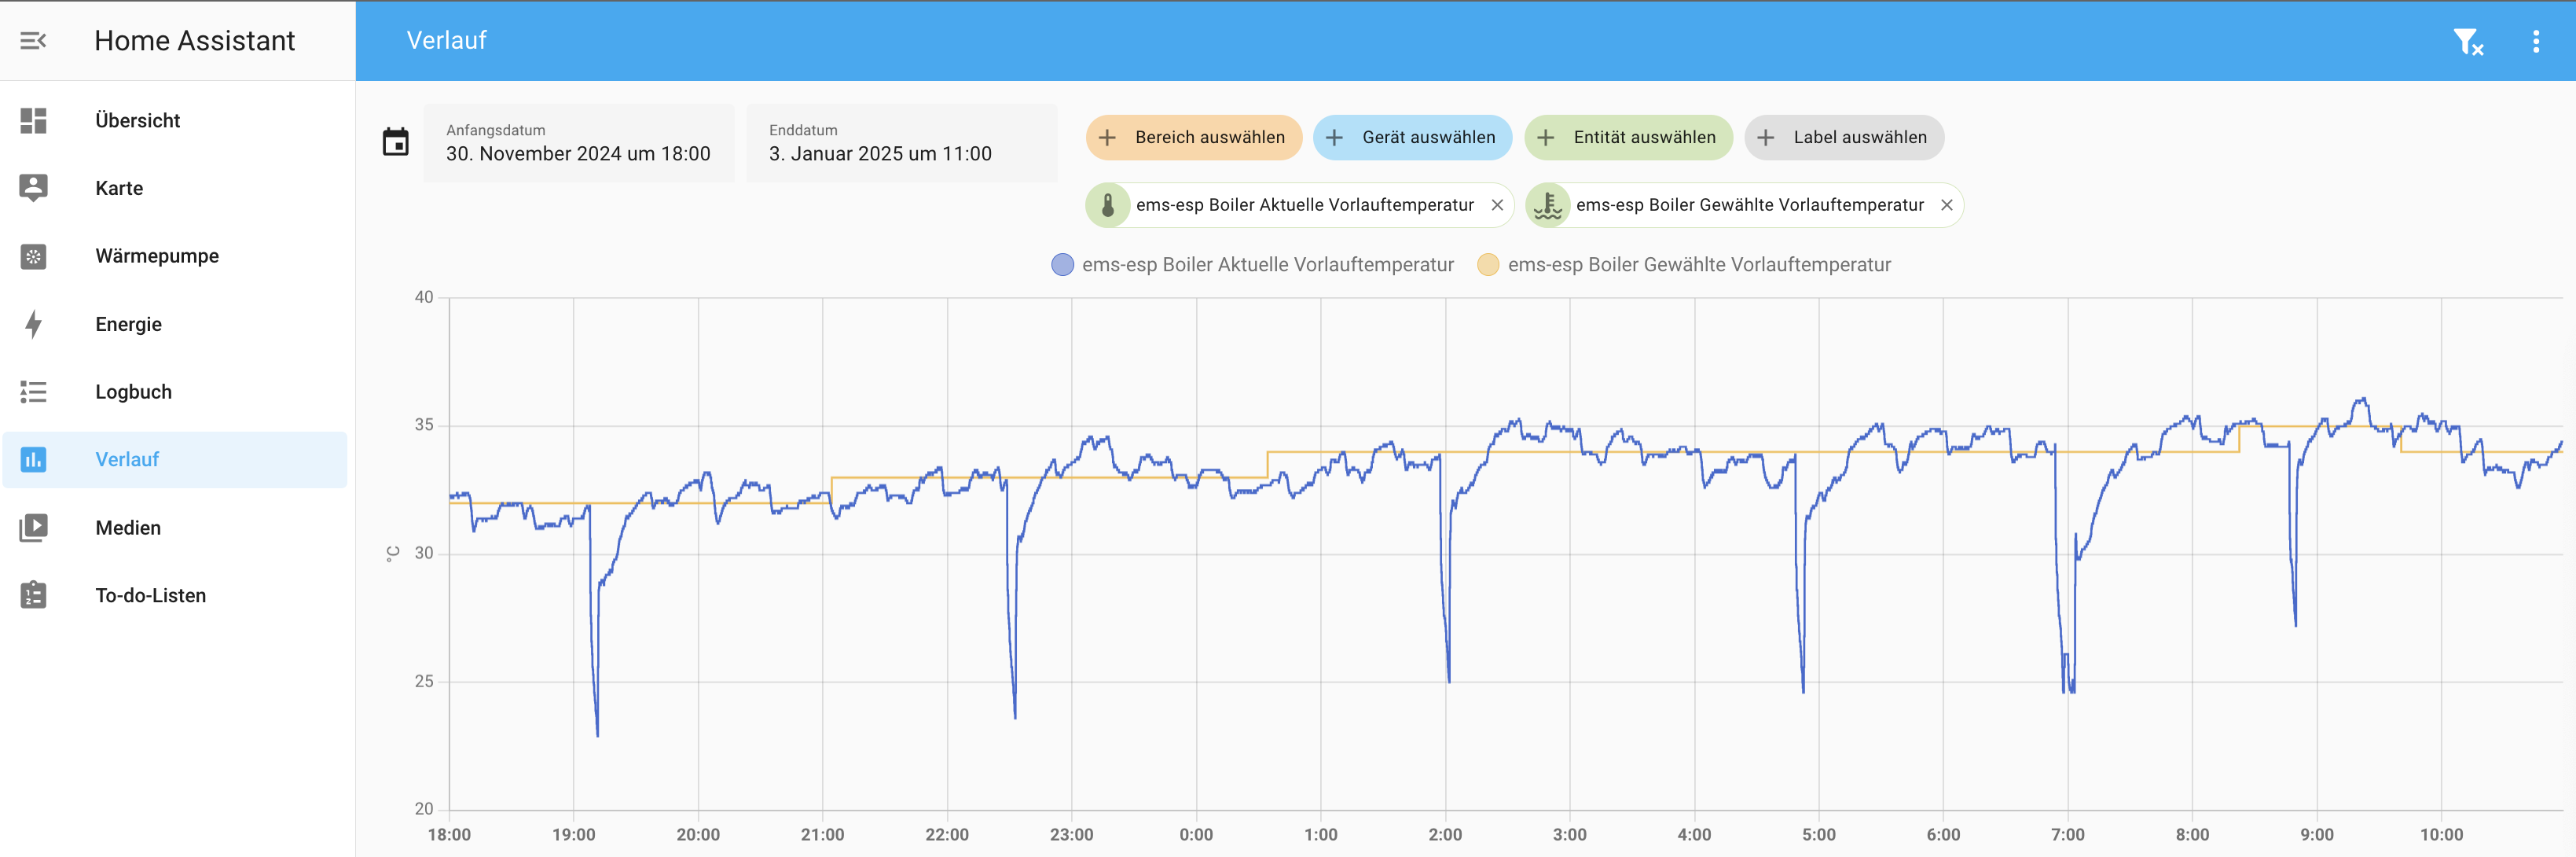
You can then get started with the first measured values! To better understand how the heat pump works and monitor its efficiency, it makes sense to display some measured values graphically. Clicking History in the menu on the left allows you to select entities whose history you want to display. The following measured values are shown in the history below:
- Boiler Selected Flow Temperature: the desired flow temperature resulting from the configured heating curve and the outdoor temperature. In the example shown, the outdoor temperature was -2..-4 °C and the target flow temperature was 32..35 °C.
- Boiler Current Flow Temperature: the actual flow temperature, which, as shown in the chart, oscillates around the selected flow temperature. The downward deviations are defrost cycles, as the humidity was approximately 90%.

Performance factor/COP with helper entities
The performance factor, sometimes also referred to as COP, provides particularly interesting insight into the system’s efficiency. The performance factor is not directly available via ems-esp, but it can easily be set up. The performance factor is the quotient of the thermal power output Q and the electrical power consumption P. For the calculation, you need 3 helper entities:
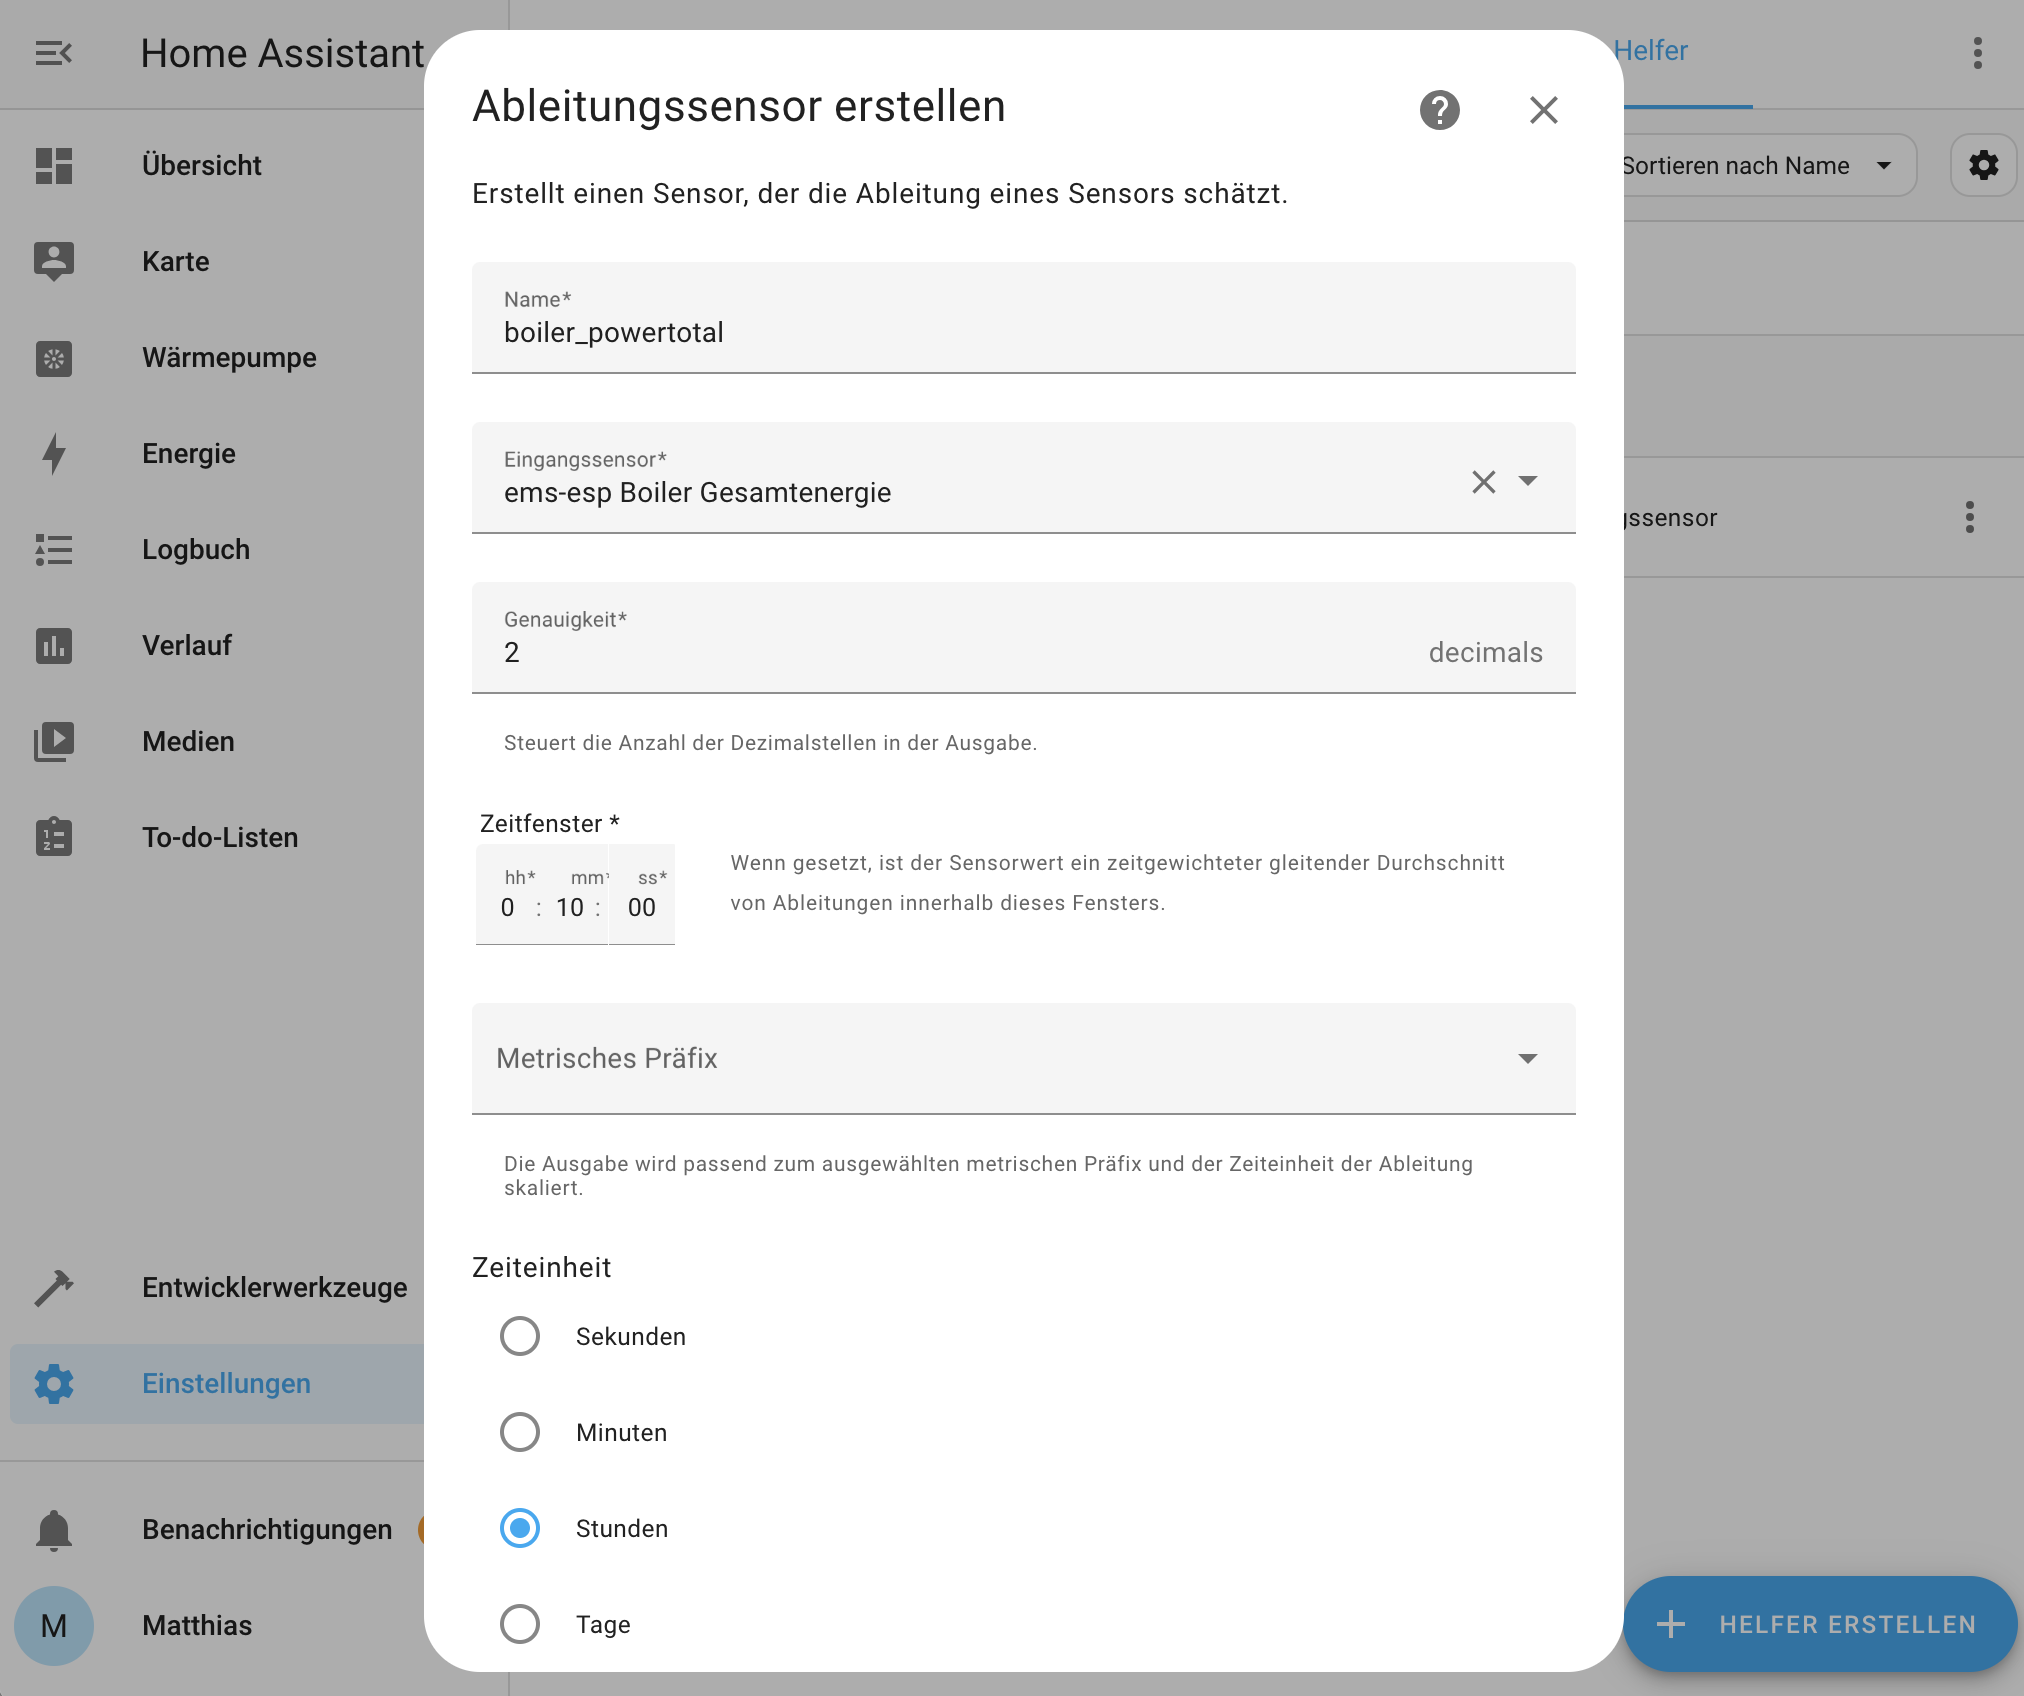
- Thermal power output as a derivative sensor of thermal energy
- Type: Helper → Derivative Sensor
- Name: boiler_powertotal
- Input sensor: ems-esp Boiler Total Energy
- Accuracy: 2 decimals
- Time window: at least 10 minutes to smooth out measurement inaccuracies somewhat
- Time unit: Hours
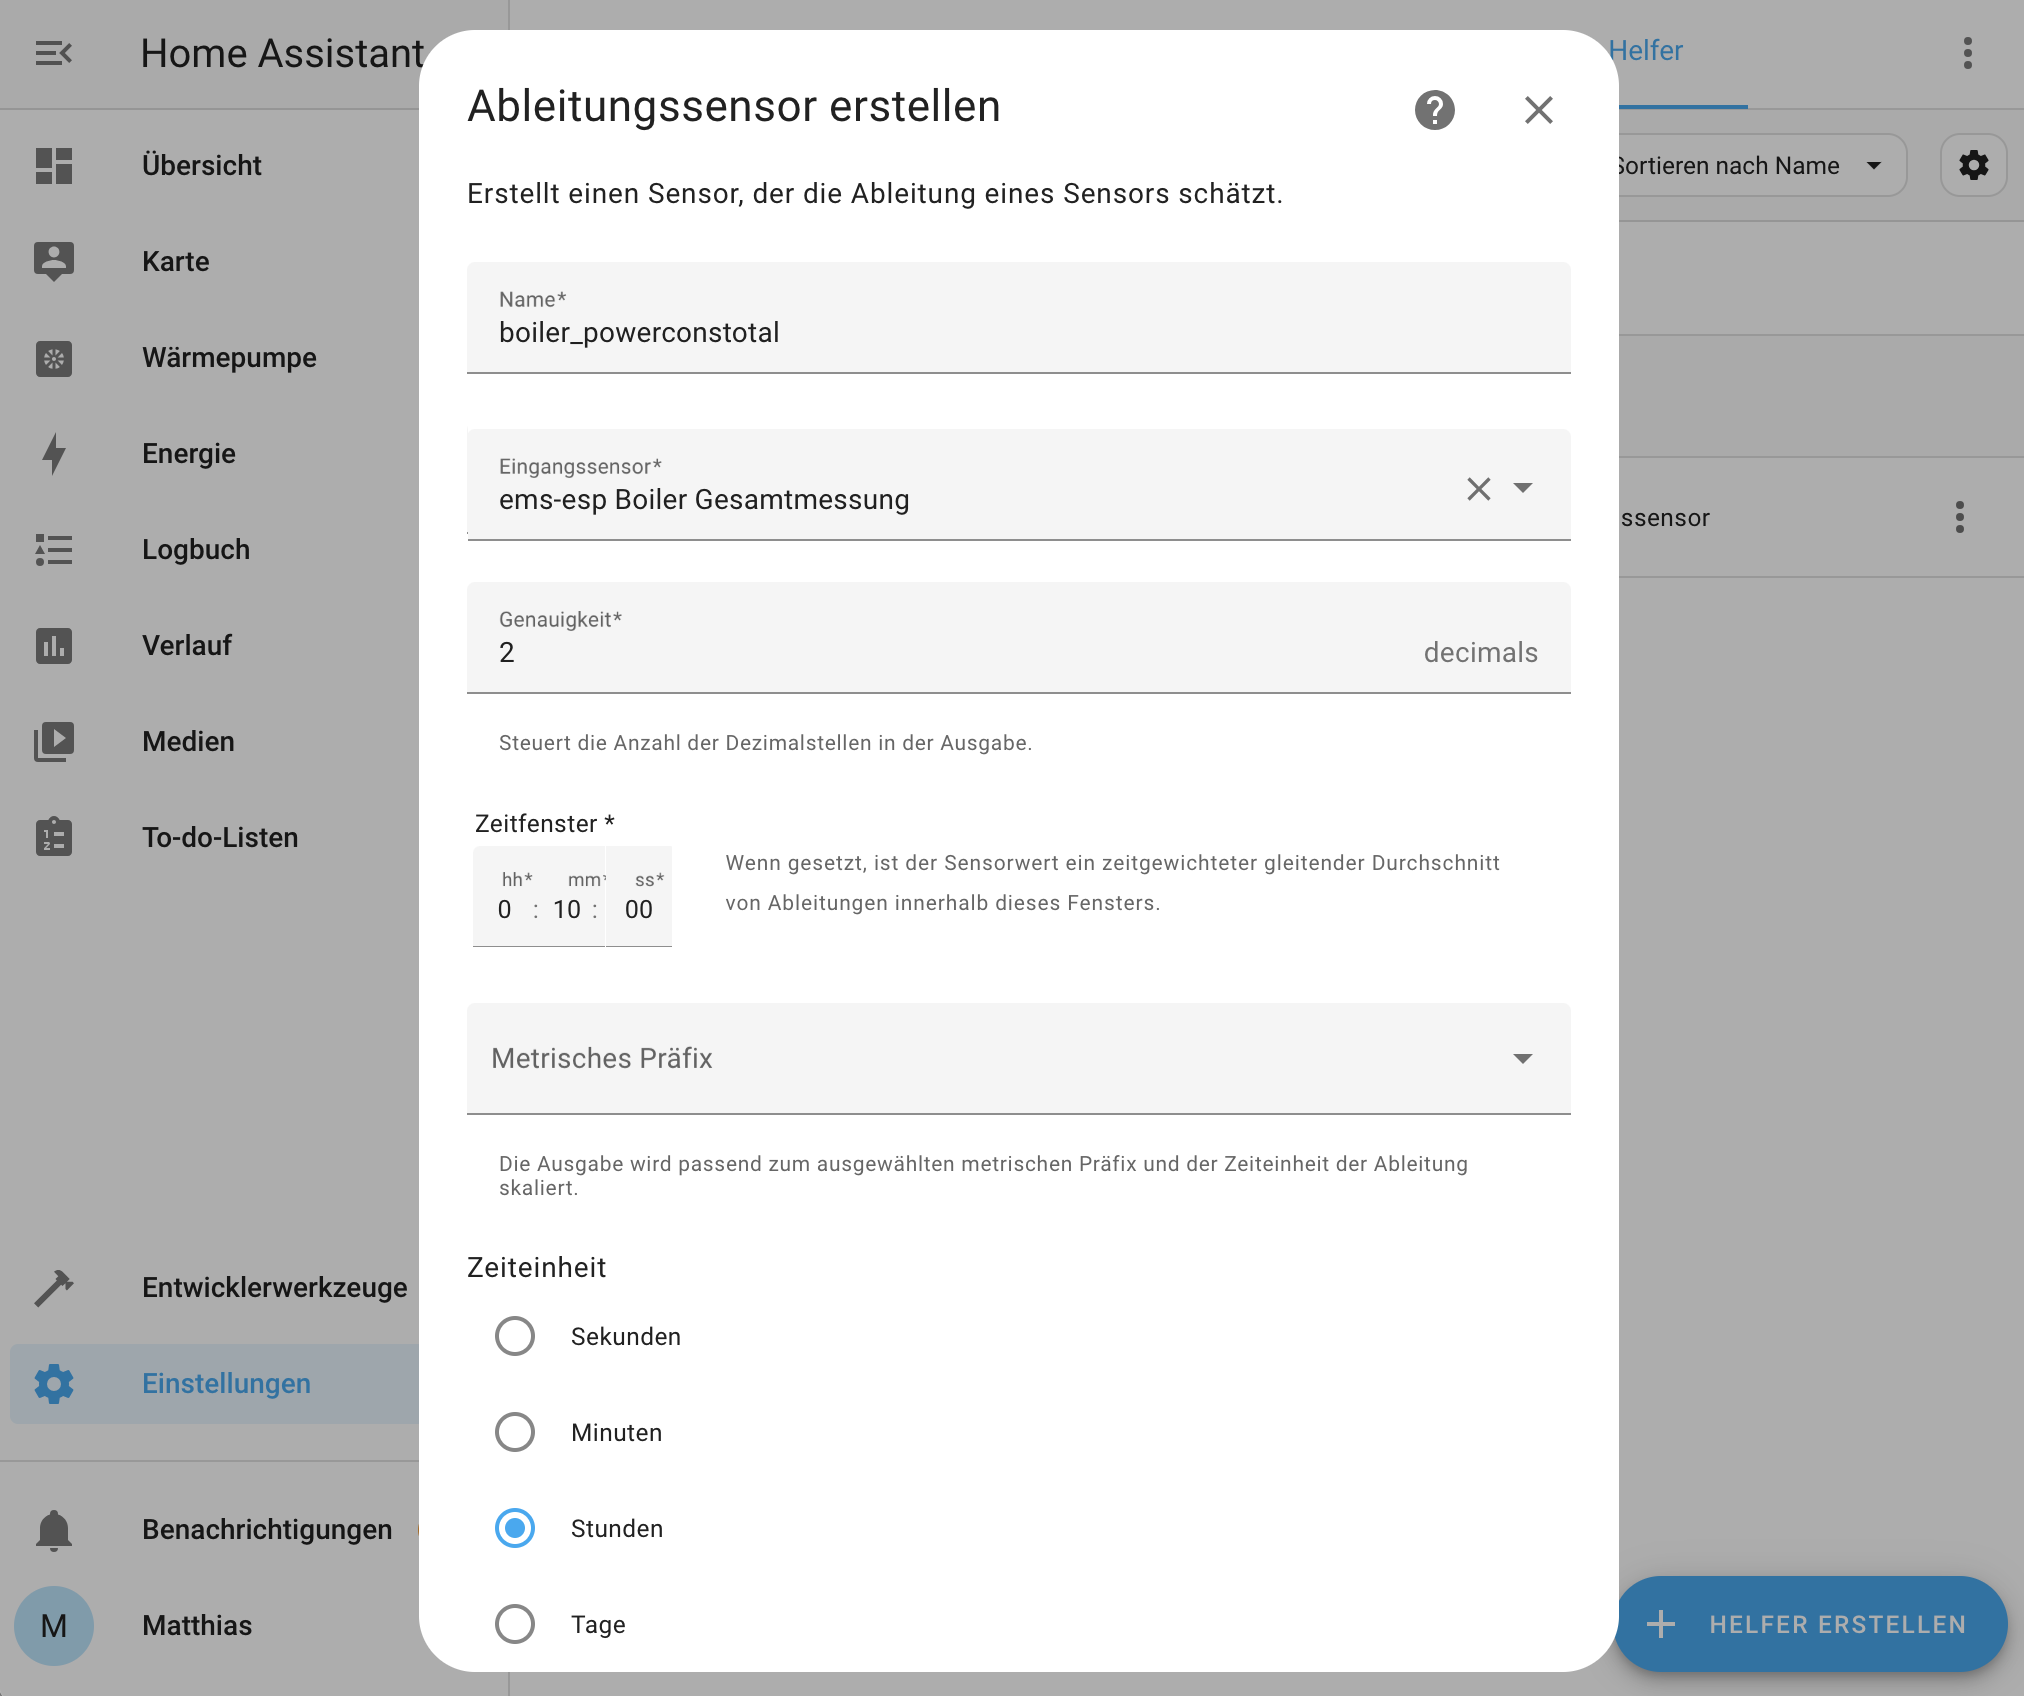
- Electrical power consumption as a derivative sensor of electrical energy
- Type: Helper → Derivative Sensor
- Name: boiler_powerconstotal
- Input sensor: ems-esp Boiler Total Measurement
- Accuracy: 2 decimals
- Time window: at least 10 minutes to smooth out measurement inaccuracies somewhat
- Time unit: Hours
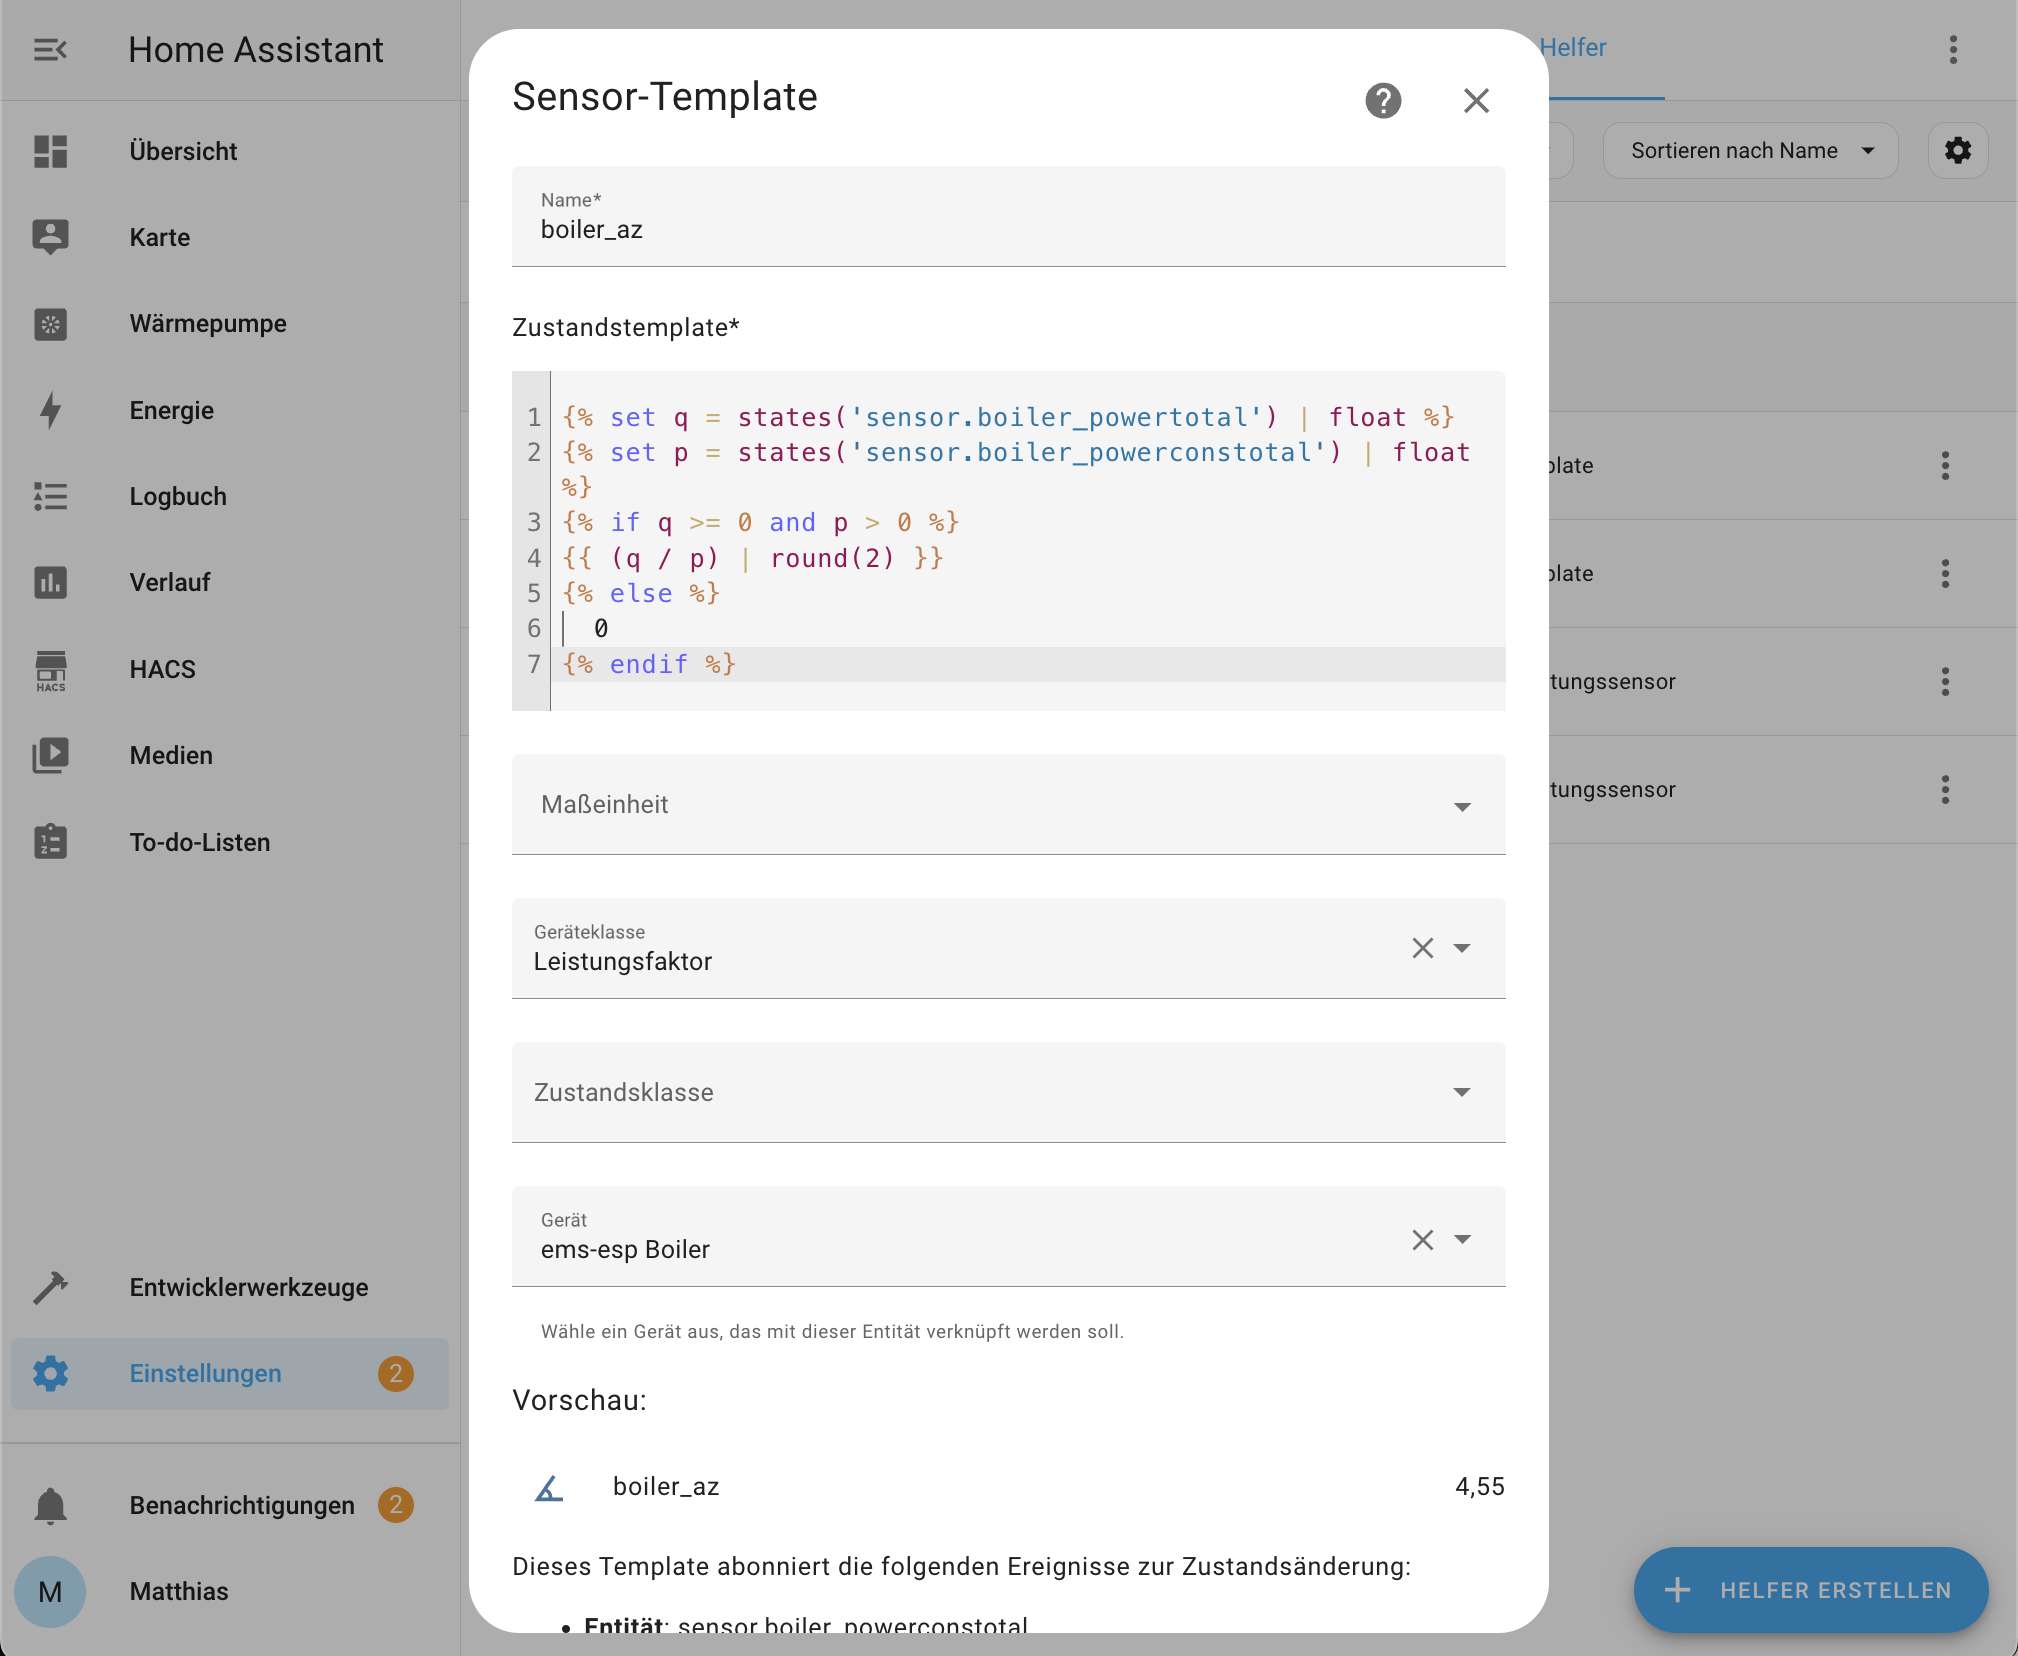
- Performance factor as a Template for a sensor
- Type: Helper → Template → Template for a sensor
- Name: boiler_az
-
State template:
{% set q = states('sensor.boiler_powertotal') | float %} {% set p = states('sensor.boiler_powerconstotal') | float %} {% if q >= 0 and p > 0 %} {{ (q / p) | round(2) }} {% else %} 0 {% endif %} - Device class: Power Factor
- Device: ems-esp Boiler
As already described above for the flow temperature, you can also view the 3 new helper entities over any freely selectable period in the history:
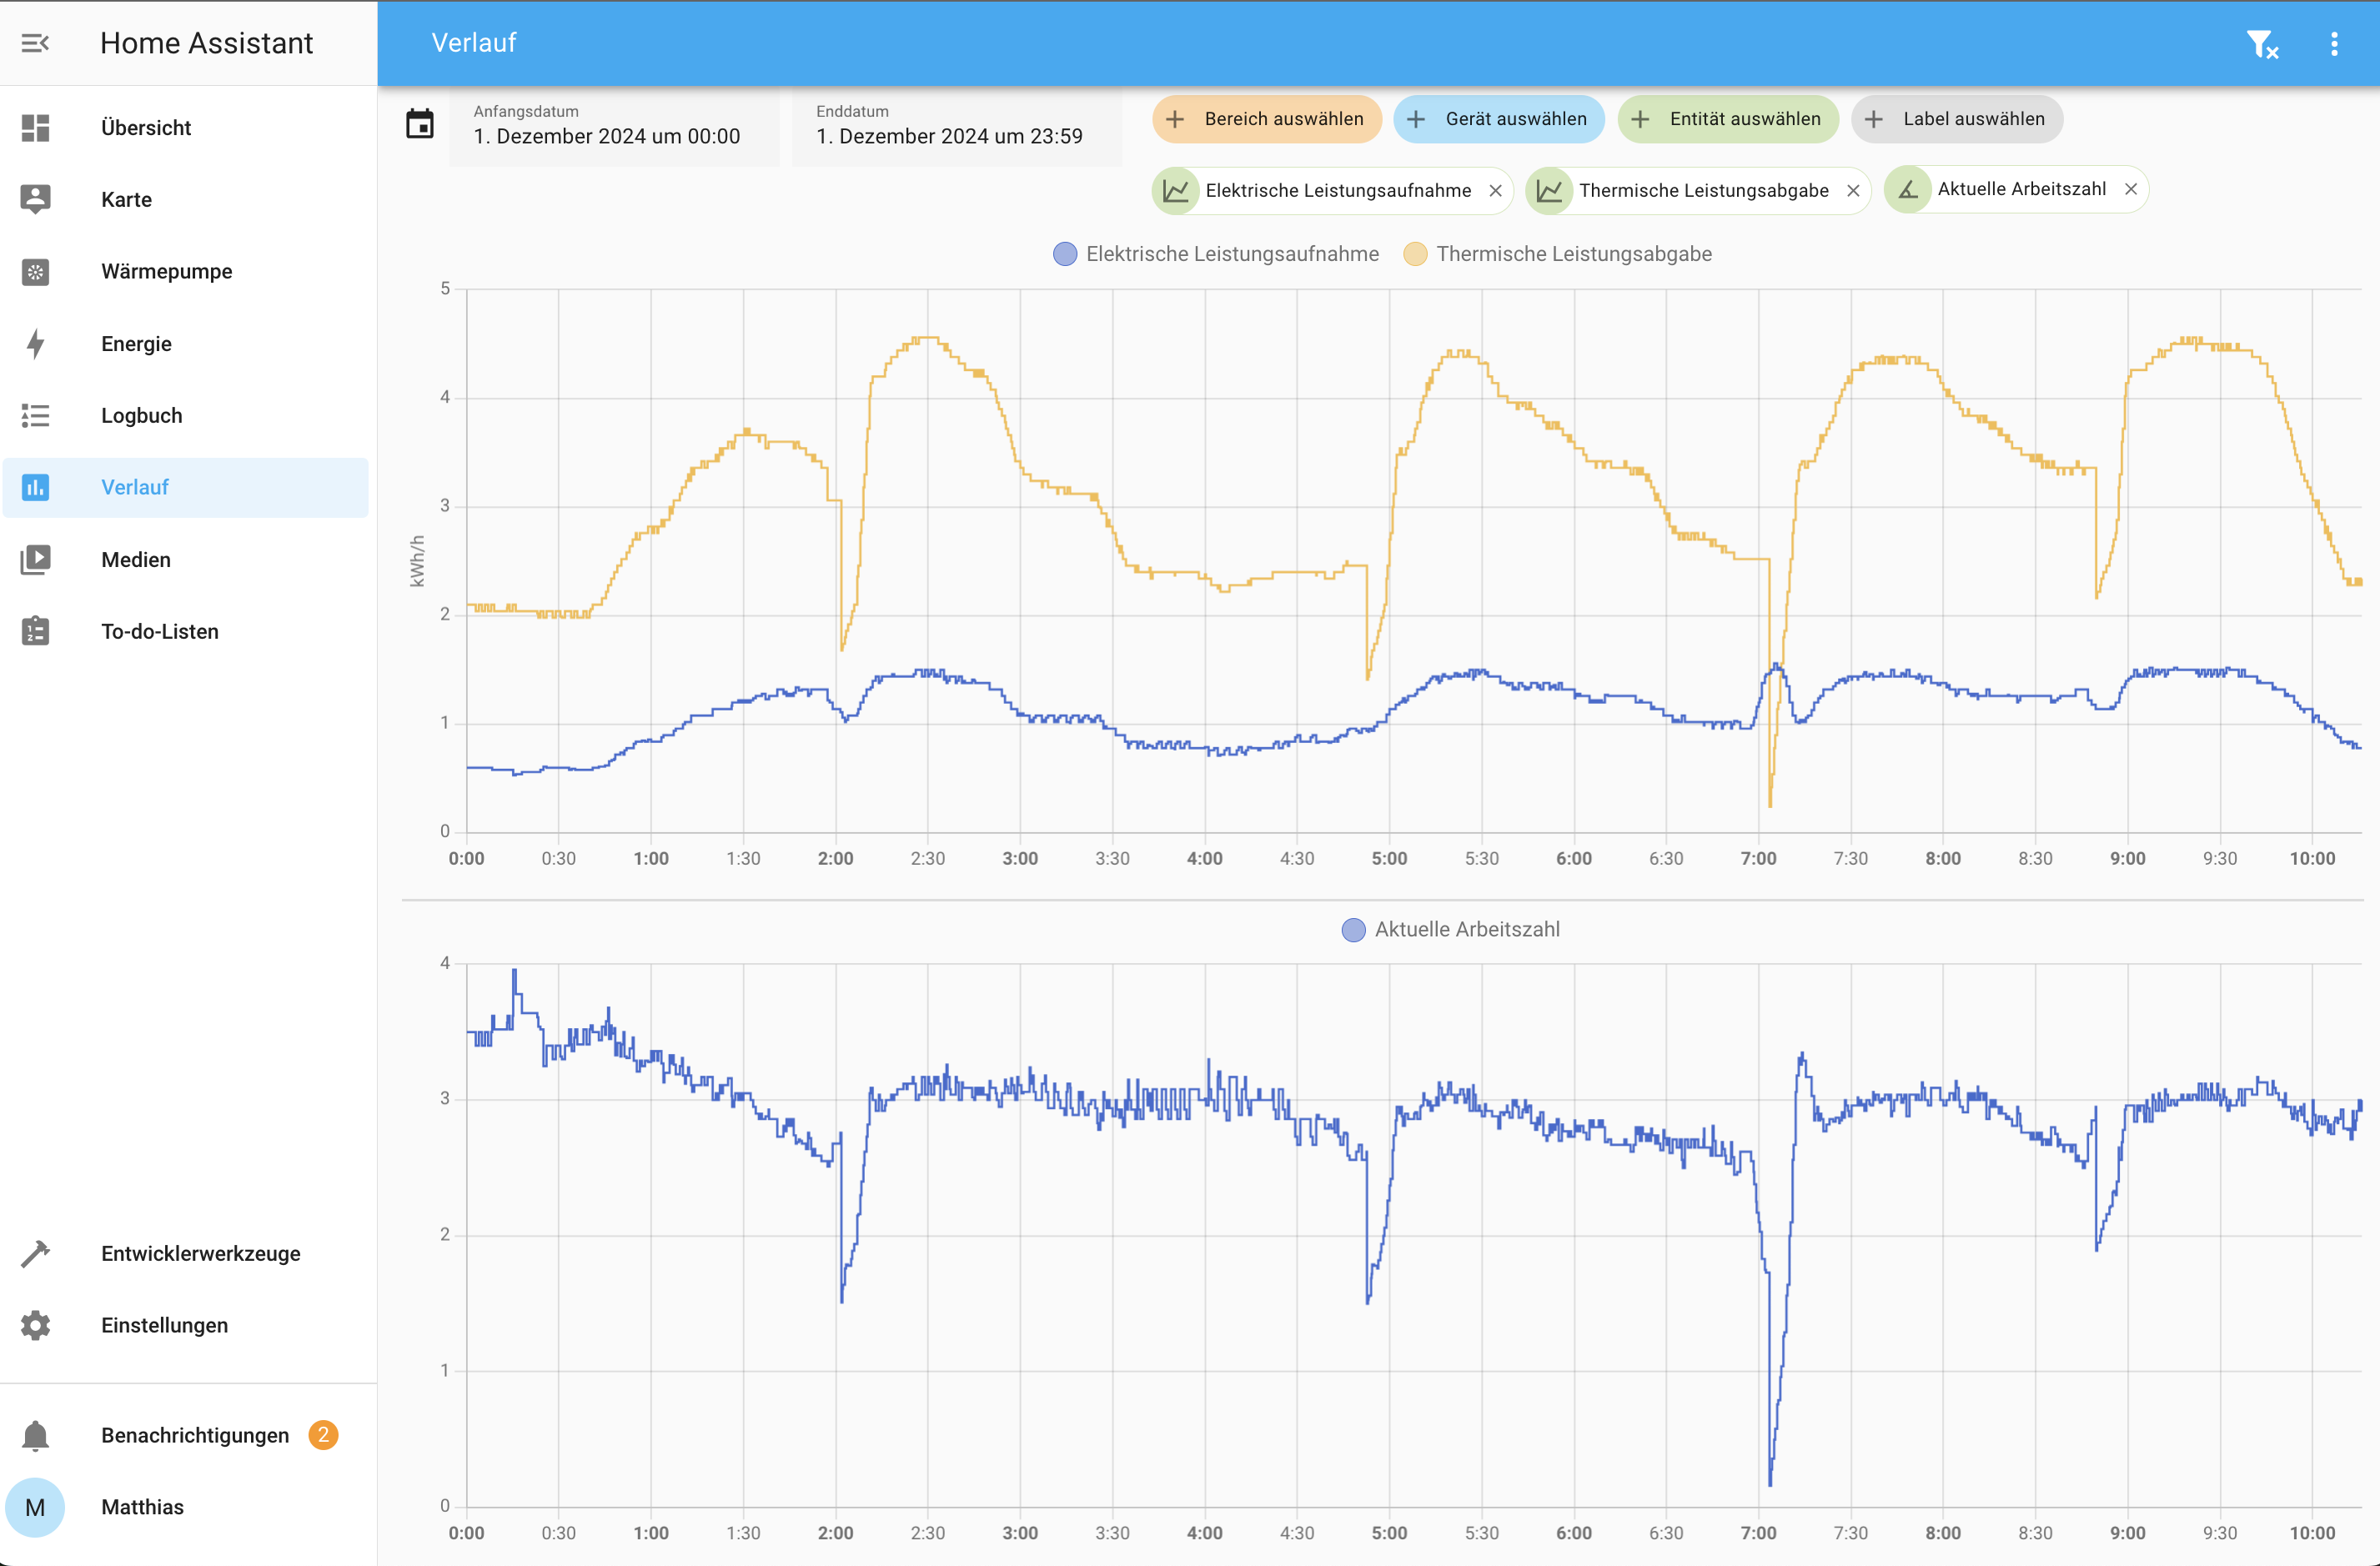
The chart shows the 3 helper entities at an outdoor temperature of -5 °C. The electrical power consumption fluctuates between 530 W and 1600 W. Using ambient heat, this produces between 2000 W and 4700 W. The performance factor is approximately 3 during normal operation and drops sharply when the defrost cycle starts, as thermal energy is “lost” for defrosting.
You probably do not just want to see the current performance factor, but also evaluate it over the entire operating time of your heat pump. To do this, simply create another helper entity for the seasonal performance factor:
- Type: Helper → Template → Template for a sensor
- Name: boiler_jaz
-
State template:
{% set q = states('sensor.boiler_nrgsupptotal') | float %} {% set p = states('sensor.boiler_nrgconstotal') | float %} {% if q >= 0 and p > 0 %} {{ (q / p) | round(2) }} {% else %} 0 {% endif %} - Device class: Power Factor
- Device: ems-esp Boiler
Fixing errors with the derivative sensor
As long as the heat pump is running and ems-esp Boiler Total Energy consequently changes over time, the helper entities work as expected. However, when the heat pump is off, ems-esp Boiler Total Energy no longer changes. In this case, you would expect the derivative sensor boiler_powertotal created above to output 0 kW for the power output and the resulting performance factor to be 0. However, Home Assistant does not pass on any updates when the value remains unchanged. Unfortunately, this means that the derivative sensor is not updated, so its value never reaches 0 kW and the performance factor incorrectly shoots up.
A forced update (force_update) using the following automation resolves this issue. To do this, open Settings → Automations & Scenes, then select CREATE AUTOMATION in the lower right and choose Create new automation. Then click the three dots in the upper right, select Edit in YAML, and paste the following configuration into the text field:
alias: "WP MQTT: Set force_update on boiler_nrgtotal if missing"
description: >-
  This automation adds 'force_update: true' to the discovery message of
  'boiler_nrgtotal' when the flag is missing or false, preserving all other
  content.
triggers:
  - topic: homeassistant/sensor/ems-esp/boiler_nrgtotal/config
    trigger: mqtt
conditions:
  - condition: template
    value_template: >
      {% set payload = trigger.payload | from_json %} {{ not
      payload.get('force_update', False) }}
    enabled: true
    alias: Only if force_update flag is false or missing entirely
actions:
  - data:
      topic: homeassistant/sensor/ems-esp/boiler_nrgtotal/config
      payload: >
        {% set payload = trigger.payload | from_json %}{{ dict(payload,
        force_update=true) | to_json }}
      retain: false
    action: mqtt.publish
    enabled: true
mode: single
After saving, force_update is automatically activated for boiler_nrgtotal, and both the helper entity for the power output and the performance factor work as expected—even when the heat pump is off.
Heat pump dashboard
To get all relevant measured values at a glance, it is recommended to create a dashboard as the next step. A simple dashboard for the heat pump could look like this:
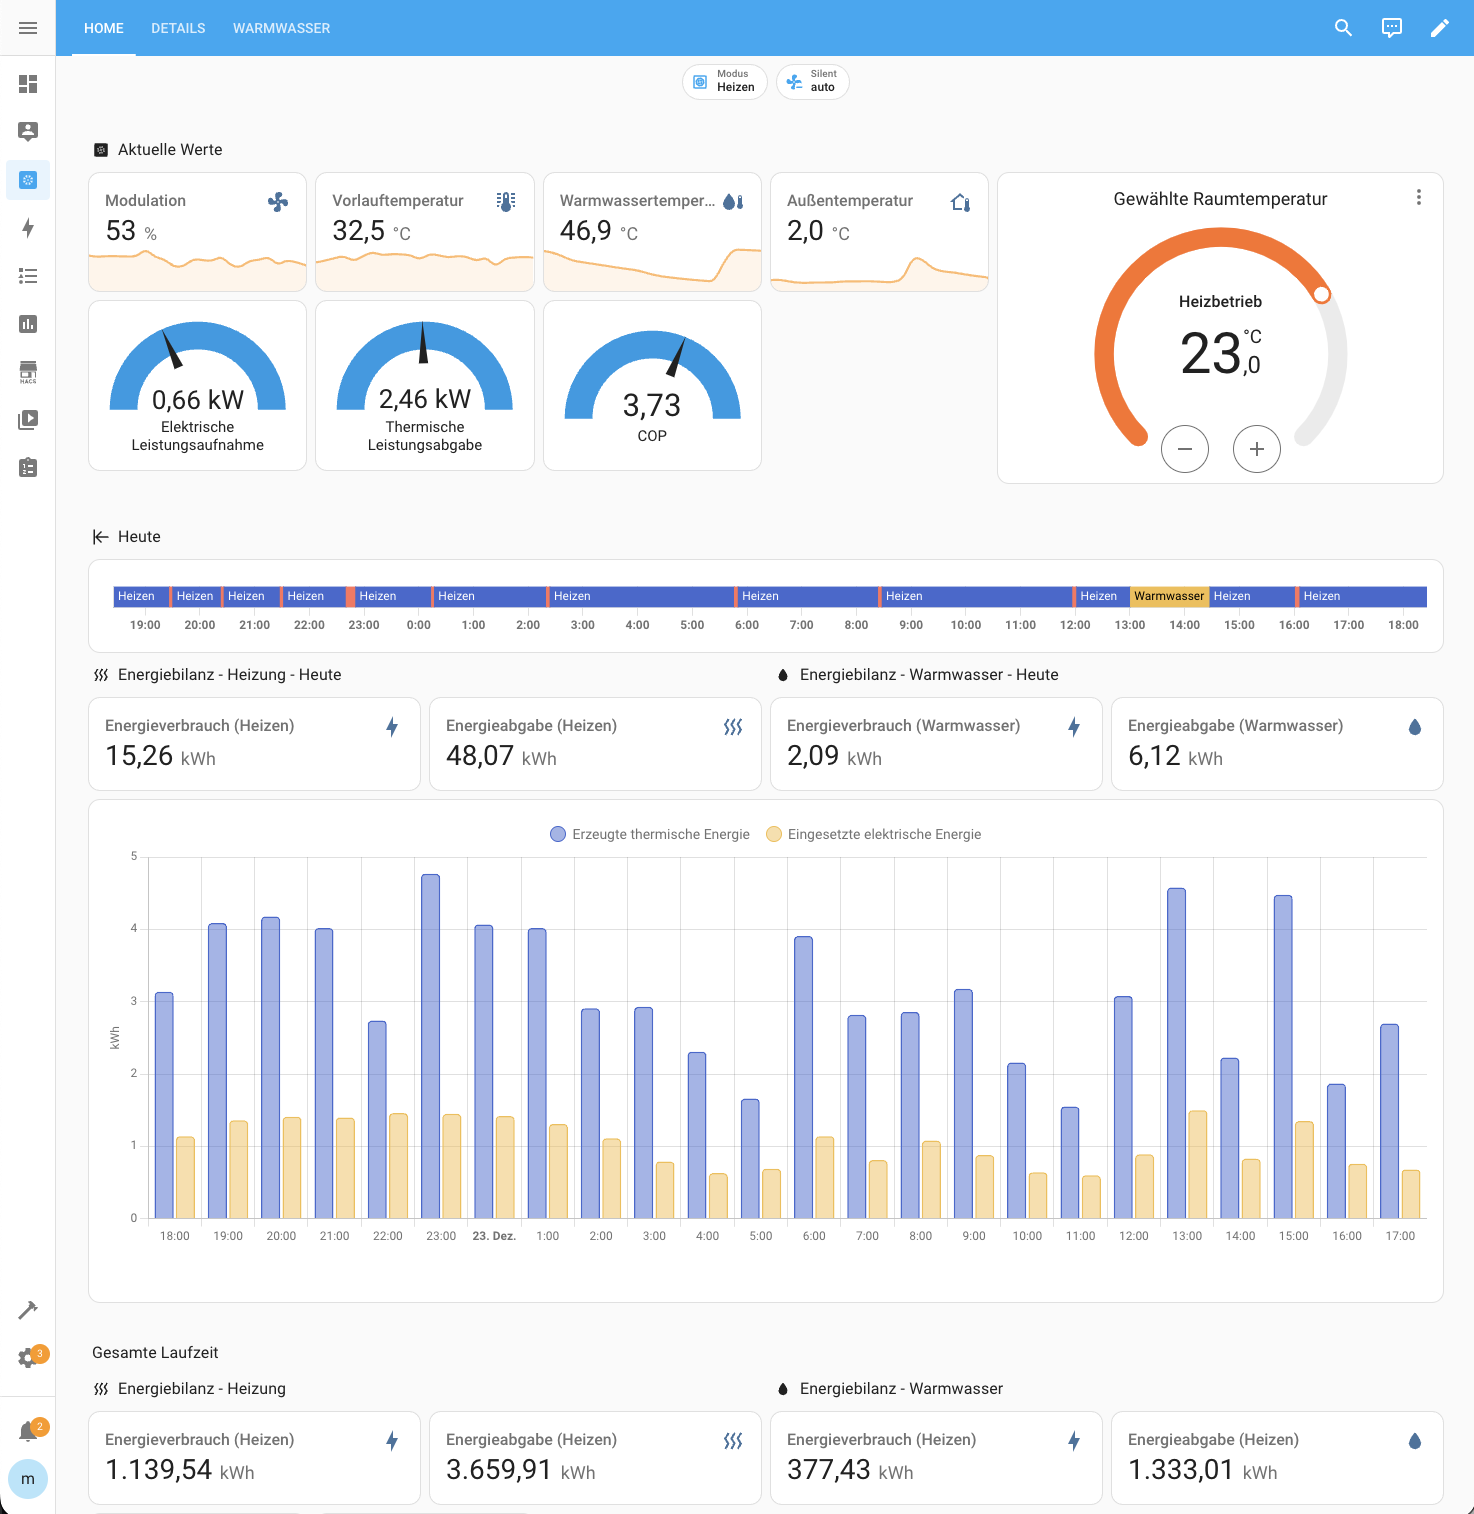
You can find the configuration for this dashboard here: https://github.com/bosch-buderus-wp/home-assistant/blob/main/dashboards/simple-dashboard.yaml. To use the configuration, simply create a new dashboard in the dashboard overview:

Then click the pencil icon in the upper right, followed by the three dots, and then select Raw configuration editor. You can paste the configuration there, save it, and use the dashboard directly.
More details will follow shortly.